Over the past few months we've designed several new TBM-900 panels to go with our existing range ...
Circuit Breaker Lighting Panel
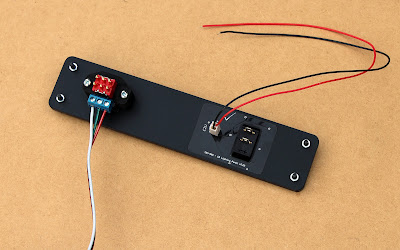
This panel includes one of our replica Korry buttons, which in the above photos is shown without any lighting. In the photo below, the lower half of the Korry has been illuminated. Our replica Korry pushbuttons have been designed to fit into the same footprint as a real Korry 389 button, as shown in a previous post about our B350 Reversionary Panels, so they can be swapped out if required.
Crew Music Panel
As with the majority of our panels, there is no interfacing or controller supplied. There are so many possible solutions - when it comes to both hardware and software - that we leave this up to our customers. Our panels are supplied fully assembled, however, with any switches, sockets, etc. mounted either directly onto the front panel or onto a mounting plate that's fitted onto the rear.
Main Circuit Breaker Panel - Lower Section
This panel, with the exception of the coloured vinyl decals and the dummy circuit breakers themselves, is fully backlit by a circuit board that's recessed into the main panel itself.
Whilst we only fit dummy circuit breakers to it, the panel has been designed so that these can be readily replaced by real circuit breakers if required. There are several PDFs on our website that contain not only the panel dimensions and required panel cutout, but also the spacing and layout of the circuit breakers, so that the fit of any real breakers can be checked/verified prior to purchasing.
Main Circuit Breaker Panel - Upper Section
You'll notice that there's a hole in the missile switch cover, which was a slight modification that we made so that it acts like a gate that allows you to switch it between NORM and EMER but still have that position maintained. Without this hole, the closed cover would push the toggle switch back into the EMER position each time. The only slight issue is that in order to do this, it was necessary to remove the spring that sat inside the switch cover, although because panel sits mostly flat, the cover will tend to fall closed by itself anyway ... !
And this is what the fully-assembled panel looks like from the rear ...
Static Source Selector Panel
There's not too much to say about this one really, although the image below offers a good example of how we typically mount components to our panels.


