Pages

Showing posts with label MIP. Show all posts

Friday, July 05, 2024

Modular B200 Simulator Construction

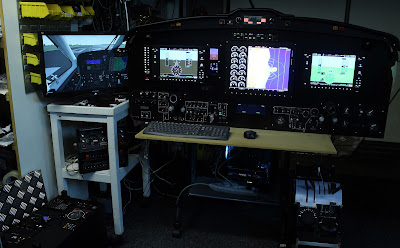
On our recent build, we couldn't fit the entire B200 cockpit structure into our small workshop, so we assembled the main instrument panel separately, organised the wiring and interfacing, and verified proper operation before then fitting everything together for final testing and delivery. This arrangement also reduced the amount of time spent clambering between the seats and over the pedestal unit ... !


Basic MIP Layout for a Cessna Citation Simulator

To help anyone who might be building a Cessna Citation simulator, we now offer a very basic MIP design that can be downloaded for free from either our website (as part of our Citation panel documentation) or separately, from here: https://buff.ly/46NhLc1

This design is in DXF format, and contains the panel cutouts for all of the relevant Citation panels that we sell. The G1000 units, the audio panels, the GMC710, and the standby gauges, however, are merely placeholders designed to help you with layout planning. You can alter the DXF files to suit whichever products you intend to use.


Friday, October 21, 2022

TBM-900 Main Instrument Panel (DXF)

We're not in a position to be able to offer a full TBM-900 main instrument panel, although because we needed to draw up an initial design around which we could organise the panels that we do make, we thought that these drawings might provide a useful starting point for someone beginning to build a simulator, instead of the files simply hiding away in our file system ...

The DXF (along with a PDF file) can be downloaded directly from our website on the following page (you'll need to scroll through to find it): https://www.ruscool.co.nz/Panel-Cutouts-Dimensions/

Below is a quick image of the model from which the DXF is derived.


The measurements are not based on a real TBM-900 aircraft, so they will not be accurate for this, but the dimensions can be modified within your own drawing software to suit the width/height of your cockpit's construction.

The design was based around the use of 3mm aluminum, and the holes and cutouts for the following Ruscool Electronics parts are included (shown fitted below, with the exception of the 15" MFD):

    - Master Caution Button
    - Master Warning Button
    - De-Icing Panel
    - Park Brake Panel
    - Gear Panel
    - ECS Panel
    - CB Lighting Panel
    - Static Source Selector Panel
    - Crew Music Panel
    - 15" MFD Unit

The DXF for the main instrument panel only shows the hole cutouts and mounting screw positions of the aforementioned panels (not their outer dimensions), although the drawings for these can be downloaded from the same page as the MIP design.

There are, of course, still several other items needed for a full TBM cockpit that you'll want to include, but which we don't sell ourselves - such as the GMC710, the GCU475, and the G1000 units. These parts will need to be added to your design separately, and suppliers who manufacture these items will likely be able to provide you with the necessary dimensions so that you can incorporate them.
Tuesday, December 03, 2019

B200 Central MIP Panel

This is the central section of a King Air B200 Main Instrument Panel that we supplied to a customer a year or so ago, complete with six of our dual radios, operational altitude alert, and an RNS530 unit.


Below is a better shot of the backlighting whilst the panel was still in the process of being populated ...


As with most of the parts that we supply, we fitted all of the hardware to the panel prior to sending it. This allows us to verify that everything fits correctly, and it also hopefully means that the installation once delivered will be a little more straight-forward.


Tuesday, November 05, 2019

Master Caution, Master Warning Buttons

Over the past week or so we've had a couple of requests for Master Caution/Warning Buttons that differ slightly from the glareshield versions that we typically offer through our website.

The first example is a little larger than our standard version, and measures 27mm (1.06 in.)  x 21mm (0.83 in.)


This button is held in place by a bracket that we also supply, and as all instrument panels and glareshields differ in thickness, we customise each bracket to ensure the correct fit.


The second set of Master Caution/Warning Buttons is more along the lines of our standard version, although the text has been altered and they're supplied without any surround.


Wednesday, July 31, 2019

C206 Main Instrument Panel

This was large custom job that we finished back in mid-2017, although we've been so busy that it's only now that we've had some time to write something up about it. The job itself was co-ordinated between our customer in France and ourselves in New Zealand, with some of the items being sent to us to fit (the General Simulator G1000 units, the TRC mixture pots, and the Flight Illusion standby gauges) and the rest of the parts being manufactured in our workshop and the entire instrument panel assembled and wired.


After spending a long time calculating various angles etc. to get our drawings correct, we had the glareshield formed for us by a local company and upholstered.


A quick note: as this was made more than two years ago now (back in 2017), we've since modified a couple of the components to better reflect the actual aircraft. Small details perhaps, but more aesthetically pleasing (see below) ...

The flaps lever: 


Pull switches:


Updated vinyl flaps labels:


Thursday, April 18, 2019

AS350 Main Instrument Panel

Here are some photos that show an AS350 MIP that we designed for a local customer back in 2017. It was designed to sit in front of an LCD monitor, so everything was constructed to be as low-profile as possible whilst still being functional.


[ Click on the photos to see the larger images ... ]


A separate post that details the individual bezels and their hardware will follow shortly ...


Backlighting was also incorporated ...


And the following viewpoint shows how little (if anything!) protrudes out the back ...

Wednesday, August 24, 2016

A customised King Air MIP

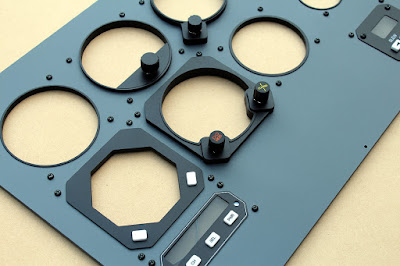
We've recently completed a full King Air main instrument panel for a customer who will be using LCD monitors in behind it to display the gauges etc. Outside of the extents of these main monitors, a separate couple of small 8 inch LCD screens will be employed to display an additional couple of gauges.

[Also, please excuse the variety of colours in these photos, which makes the same panel appear to be different shades of grey in each photo - this was merely a result of poor lighting, poor photography by myself, and poor colour correction!]


The buttons on the above DME bezel are operational and are fitted to a small circuit board that's recessed into the rear of bezel itself, which allows for it to be set away from the surface of the LCD monitor that will be placed behind it (see the photos below for the rear view).


As you can see here, the rear of the encoders are also well forward of the LCD screen's surface whilst still allowing some room for the wiring.


On this occasion we left room for one of our RNS530 units, an operational Altitude Alert System, and six of our Collins-style Dual Radios (as shown partially mocked-up in the next photo). As we try to assemble parts as fully as possible in our workshop prior to shipping, all of the hardware that's shown on this panel has been fitted onto a separate mounting plate which has then been fitted to the rear of the main panel. This hopefully makes installation a little easier ...


In the photo below, because of where the outer limits of the LCD monitors finish, the large switch on the EFIS Aux Power bezel could still protrude out the back of the panel without causing any issues. All of the other buttons have low rear profiles however, so that they can be used on other jobs in the future if necessary.