Pages

Friday, December 02, 2016

Some examples of custom work ...

Over the years we've made a lot of custom components, a small sample of which are shown below. Most of these items will only ever be one-off pieces ...

Customised King Air B200 Captain Left Panel
Customised King Air B200 Captain Right Panel. The Gear Lever
Panel was another item that we made separately.
A set of AS350 buttonheads
A custom Audio Panel
The rear of the customised Audio Panel, utilising one
of our modified PCBs for the purpose.
This panel was part of a large custom job that incorporated our 64INS and 64OUTS 
boards, gear lever with transition lighting, backlit panels, a customised
interchangeable flaps system, as well as various parts that our customer 
had already purchased elsewhere (Flight Illusion radios, iPad, etc.)


This is how the rear of the aluminium panel looked with all of our wiring completed
Another free-standing main instrument panel ...
An operational KAP140 incorporating LCD screen. 
The dummy blank panel above it helps to disguise the real size of the LCD.
This was a custom, fully-enclosed, stand-alone MIP that again incorporated
many of our own components in combination with those from other vendors,
which our customer had already purchased before sending them to us for installation.
A custom B200 MIP

Autopilot System
Custom Autopilot Knobs
EFIS System
A custom bezel designed around hardware our customer was already using.

10 Encoders Board

The 10 Encoders Universal program that's supplied with this board allows the user to configure and connect up to ten encoders which interact with Flight Simulator software, and a user-friendly configuration program allows each encoder to then be individually configured using either FSUIPC Offsets, FS Controls or Key presses.


As shown in the screenshot below, there's an option to select which type of encoder will be connected. This is important as they operate differently via the PC board. The default setting is CTS288.

There's also the ability to test the function of each encoder within the configuration program itself (without the PC board actually being connected) to make sure that all functions will work as expected.


Once the encoders have been configured, this will be shown on a separate screen:


This product isn't actually available through our official website yet, although please feel free to contact us for more details.

Magneto Switch

We have recently started manufacturing magneto switches which have a spring return from the Start position. The key actually just fits into a slot, and can be removed, but it is not a real key barrel.

We connect these ignition switches (Off-Right-Left-Both-Start) to our own I/O boards of course, but they can also be easily connected to a Bodnar BU0836X control board: the common connects to one of the BU0836X GND terminals, and the others connect to one input each. 


Thursday, October 20, 2016

Beech 99 Lower Overhead

This is actually going back a couple of years now, but for the sake of keeping our blog as complete as possible (we're still well behind!), here are some photos of a Beech 99 lower overhead panel.


The gauges shown here are only dummy units, which I think our customer actually replaced with fully operational ones later in the build.

Friday, September 30, 2016

Bell 407 Switch Panel + AFCS Unit

This is a switch panel we made a couple of months ago for a Bell 407GX simulator. 

There's only one (red) pushbutton fitted because we were simply verifying for our customer that this particular component would fit.


The Korry-type button that's shown here is a new design that we've started to use recently. It's a fairly complex arrangement and requires quite a bit of depth to be available behind the panel itself, which of course means that it's not suitable for some situations (e.g. placement in front of monitors).


The photograph below shows the panel's backlighting, and for the purpose of demonstration we've also temporarily hooked up one of the legends in the korry in order to show the clear amount of separation between the upper and lower text blocks.


Next is the AFCS unit which accompanied this particular request. Not much to say about it really - just backlit pushbuttons, indicator lights, and header.


Thursday, September 22, 2016

King Air Populated Panels (B200 and C90)

All of our populated panels (King Air as well as other types of aircraft) are now supplied with mounting plates that have all of the hardware fitted and which is supplied actually pre-fitted to the panel itself, effectively making each panel a modular unit. This hopefully means that installation is much quicker and easier, as it's no longer necessary to individually mark and cut out the hardware holes in the main instrument panel and have them all line up. All that's required is a large cut-out in the MIP with some tabs left in the appropriate places for the main mounting holes.

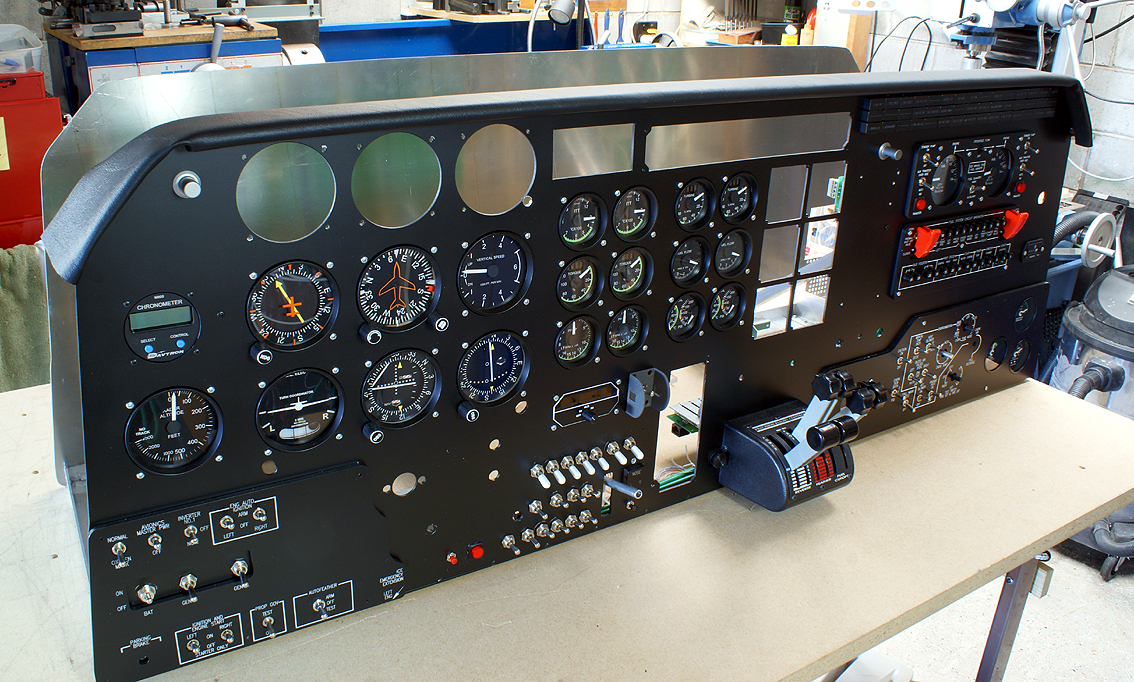
King Air B200 First Officer's Left Panel


With a typical populated panel like this, we would normally supply a dummy gauge with artwork etc. that would be fitted into the hole, although if a gauge from another supplier is to be used then we can simply make the appropriately sized hole and deduct the price of our gauge accordingly.


We've recently updated the knobs that we supply with these panels too, which can be seen below.


Below is a close-up shot of the Cabin Temp Mode knob.


King Air C90 Captain's Left Panel


Because the mounting of the hinge and the gang switch cover can be quite a difficult operation, we now completely fit this at the time of assembly.


And as with all of our panels, they can be supplied with the warm white lighting as shown in the previous photos (which mimics the glow of incandescent bulbs) or the cool-white lighting shown in the photograph below.


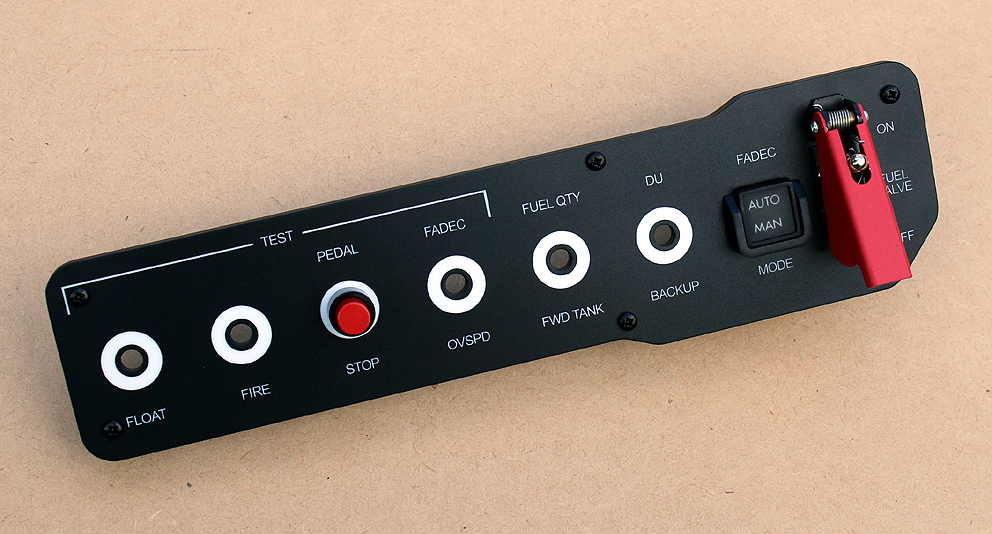
King Air C90 Captain's Right Panel


This panel is supplied fitted with one of our standard landing gear levers, which is fitted directly to the rear of the panel. Depending on how the main instrument panel is constructed, the landing gear lever (as well as every other piece of hardware that's fitted to the mounting plate) can be readily removed and installed however you wish.


The gear indicator comes pre-fitted with a pushbutton in behind it (for Lamp Test function if desired) as well as a wired set of green LEDs which can be easily hooked up to whichever interface system is intended to be used.


The two-way header that's shown here is labeled with 12V, although we can organise the backlighting for either 5V or 12V supply.


The red illumination in the handle of the landing gear lever is supplied as standard and is designed to be indicate when the gear is in transition. We often use our own 64INS and 64OUT interface boards to control this operation, as well as the appropriate lighting of the NOSE, LEFT and RIGHT indicators on the gear button (as shown below), which all come on individually and at separate times. The timing of these is a function of the way that we have things set up in our configuration files.