Friday, July 12, 2024
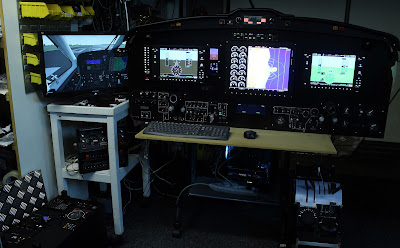
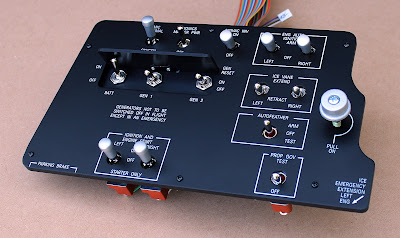
TBM-900 Overhead Panel
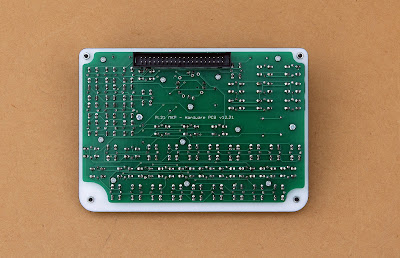
LCD1000 updates
We've recently updated our LCD1000 units to have the five hot keys properly align with the EFD1000 gauge from Sim Innovations: https://buff.ly/4c4nKfK .
Whilst in the process of doing this, we also enhanced the imitation SD card slot, and made some slight adjustments to the engraving.
Friday, July 05, 2024
King Air SELCAL Panel
Located in the pedestal unit of the King Air B200 simulator we completed late last year, these photos show the SELCAL Panel.
TBM-900 De-Icing System Panel
Photos don't always capture details such as the types of switches we use, so this video of our TBM-900 De-Icing Panel offers a more comprehensive view.
King Air Oxygen Valves
Here are a couple of photos showing the oxygen valves we recently built for a B200 simulator.
They replicate the actual aircraft's operation through a press-to-pull-out mechanism and are designed solely to provide tactile authenticity; they do not actually have functional roles within the simulator environment.
These oxygen valve panels are typically installed in the cabin's ceiling.
Beechcraft Duke design work
For a variety of reasons, not every project we start ends up being completed, which was the case for a Beechcraft Duke simulator that we started designing some panels for back in 2019. It was an interesting project, so here are some initial renderings of the (stalled) progress ...
We've never been asked about any Duke panels again, but if there's anyone out there intending to build or upgrade one, maybe we can help ... !
King Air Fire Buttons
Here's a quick video that shows the Fire Buttons being tested in the B200 simulator we finished several months ago. It's only a small component, but we're very pleased with the results, as it was a complex design in a tight space.
The simulator was being housed in another local company's warehouse by this stage, as it was too large for our own workshop, hence the ambient noise. If you listen closely though, you can hear the Fire Warning audio ...
Modular B200 Simulator Construction
On our recent build, we couldn't fit the entire B200 cockpit structure into our small workshop, so we assembled the main instrument panel separately, organised the wiring and interfacing, and verified proper operation before then fitting everything together for final testing and delivery. This arrangement also reduced the amount of time spent clambering between the seats and over the pedestal unit ... !
King Air Glareshield Annunciators: LCD Version
For the B200 simulator that we completed recently, we developed some new LCD Annunciator Panels to reflect those used in the real aircraft that we were basing our construction on. Here's a couple of photos of the Glareshield Annunciator Panel.
Because of limitations related to the available sizes of TFT LCD screens, we essentially had to build this into the glareshield structure as we were putting it all together. As a result, unfortunately this item isn't currently in a state where we can offer it for general sale, although we may look into designing a more builder-friendly version in the future if there's enough interest.
King Air Cockpit Voice Recorder
Shown here already fitted into a pedestal console is the latest version of our B200 Cockpit Voice Recorder.
Although not lit up in any of these photos, this panel includes an embedded 12V LED circuit board, which you can see in the photo that shows the panel from the rear.
The small gauge is a dummy unit only, and is not designed to be interfaced. Similarly, the microphone is not a real unit either.
B200 Fuel and Overhead Modules
Here are both the overhead module and the fuel module for the B200 simulator that we worked on last year.
Again, these versions are slightly different to those shown on our website, as they were both custom-built for training purposes and needed to reflect the specific layout of our customer's real aircraft.
B200 First Officer Left Panel
The majority of the panels we make use cool-white backlighting, although in this instance our customer required warm-white, which is closer to the look offered by traditional incandescent bulbs.
Because this panel is being used in a training environment, the necessary locking toggle switches were also fitted. These aren't standard on our panels, but we're always happy to discuss options such as this.
Basic MIP Layout for a Cessna Citation Simulator
To help anyone who might be building a Cessna Citation simulator, we now offer a very basic MIP design that can be downloaded for free from either our website (as part of our Citation panel documentation) or separately, from here: https://buff.ly/46NhLc1
This design is in DXF format, and contains the panel cutouts for all of the relevant Citation panels that we sell. The G1000 units, the audio panels, the GMC710, and the standby gauges, however, are merely placeholders designed to help you with layout planning. You can alter the DXF files to suit whichever products you intend to use.
B200 Captain Right Panel
Another B200 panel that has a different configuration from the standard B200 panels that we sell. This panel was customised for the B200 simulator that we recently built for a local customer, and included all of the wiring!
Replica Pro Line Fusion Console Controls
This complete module package includes dual controllers—one specifically for the MKP and another for the operation of the CCPs and SKPs.
B200 ELT Panel and Housing
Also for the previously mentioned B200 simulator, situated just behind the Fuel Module on the Captain's side, this panel contains a replica Emergency Locator Transmitter (ELT), as well as a dummy gauge for the outside temperature.
Replica GCU477
B200 Captain Left Panel
Last year we overhauled an entire B200 simulator with a newly-designed set of panels that mimic those found in the real aircraft, as our customer was replicating it for training purposes.
Here are some photos of the Captain Left Panel ...
Friday, October 21, 2022
TBM-900 Main Instrument Panel (DXF)
We're not in a position to be able to offer a full TBM-900 main instrument panel, although because we needed to draw up an initial design around which we could organise the panels that we do make, we thought that these drawings might provide a useful starting point for someone beginning to build a simulator, instead of the files simply hiding away in our file system ...
The DXF (along with a PDF file) can be downloaded directly from our website on the following page (you'll need to scroll through to find it): https://www.ruscool.co.nz/Panel-Cutouts-Dimensions/
Below is a quick image of the model from which the DXF is derived.
- Master Caution Button
- Master Warning Button
- De-Icing Panel
- Park Brake Panel
- Gear Panel
- ECS Panel
- CB Lighting Panel
- Static Source Selector Panel
- Crew Music Panel
- 15" MFD Unit
The DXF for the main instrument panel only shows the hole cutouts and mounting screw positions of the aforementioned panels (not their outer dimensions), although the drawings for these can be downloaded from the same page as the MIP design.
There are, of course, still several other items needed for a full TBM cockpit that you'll want to include, but which we don't sell ourselves - such as the GMC710, the GCU475, and the G1000 units. These parts will need to be added to your design separately, and suppliers who manufacture these items will likely be able to provide you with the necessary dimensions so that you can incorporate them.


